Last year I was sewing with my sweet friend Irene and she showed me the sweetest bowl she had made. I remember looking at the bowl and sort of marveling over how amazing it looked, not recognizing initially that it was made from rope. Fairly ordinary lackluster rope at that. She said she would show me how to make one and in the span of just a few minutes I was off making one of my own. It was love at first make! This project hits the sweet spot for me- easy, practical, adorable and inexpensive to make. Before I knew it I had made several and had no plans to stop making them. Before I knew it I had people asking me how to do it and it is such a fun thing to show someone how to make because there is this moment when they realize how actually simple they are to make and they are off and running too- or should I say off and sewing! There are some good tutorials out there to help get you started and I thought I would share my thoughts and experiences as well in the hopes of encouraging you to give it a try. There is something so relaxing about making these baskets. the way they grow with the steady thumping of the machine, watching the thread and picking colors and fabrics to wind around the rope. The whole process is relaxing and meditative to me. My other favorite thing is that they are just about foolproof. You can be successful on your very first try. The stitches are forgiving and there are no rules other than to make sure your stitch catches both pieces of rope (I will get to that part soon...). I hope my tips and tricks inspire you to try one of your own. Now without further ado, here is what I have learned in making all these baskets!
Supplies:
Rope. I use 3/16" cotton clothesline for my baskets. I haven't experimented with other ropes because I found one I like and have stuck with it. I encourage you to try other ropes though because part of what is fun about making these is experimenting. I get my rope on Amazon. It is helpful to buy it there because you can read the reviews and in them you will occasionally find comments from people who have made rope baskets so it is helpful to know their experience. If you intend to dye your basket, know the fiber content of your rope so you can choose the appropriate dye. I dyed a basket made with 100% cotton clothesline and used Dylon dye and it turned out beautifully.
Thread. You will use a substantial amount of thread! I use All Purpose thread, wait for it to go on sale and stock up when it does. I wind three or four bobbins depending on the size of basket I am going to make before I begin so I don't have to keep making new bobbins throughout the process. The fun thing about thread is that because you are zigzagging and covering a fair amount of area with your stitches, the thread you choose will cast a color over your bowl. I tend to like paler thread colors so it feels like a nice wash of color, or white thread as that actually brightens the overall look of the basket.
Needle. I use a Universal needle- a nice new sharp needle makes the job a little smoother.
Getting Started!
All you are doing to make this basket is using a wide zig zag stitch to join rope in a circular fashion. As you wind the rope around itself, the stitch goes through each side of the rope, joining the coil together. That is it- just a big zig zagged circle. On my machine I use a regular zig zag stitch set at a stitch width of 6.0 and a stitch length of 1.5.
Step one. Make a nickel sized coil of rope with the tail of the rope to the right side of the coil.

You always want the rope to your right because as you build your basket and you are forming the sides, the rope will need to be on the right. Place your coil under your presser foot and stitch all the way across the center and then reverse and stitch back to where you started. When you are stitching, keep your needle in the needle down position.
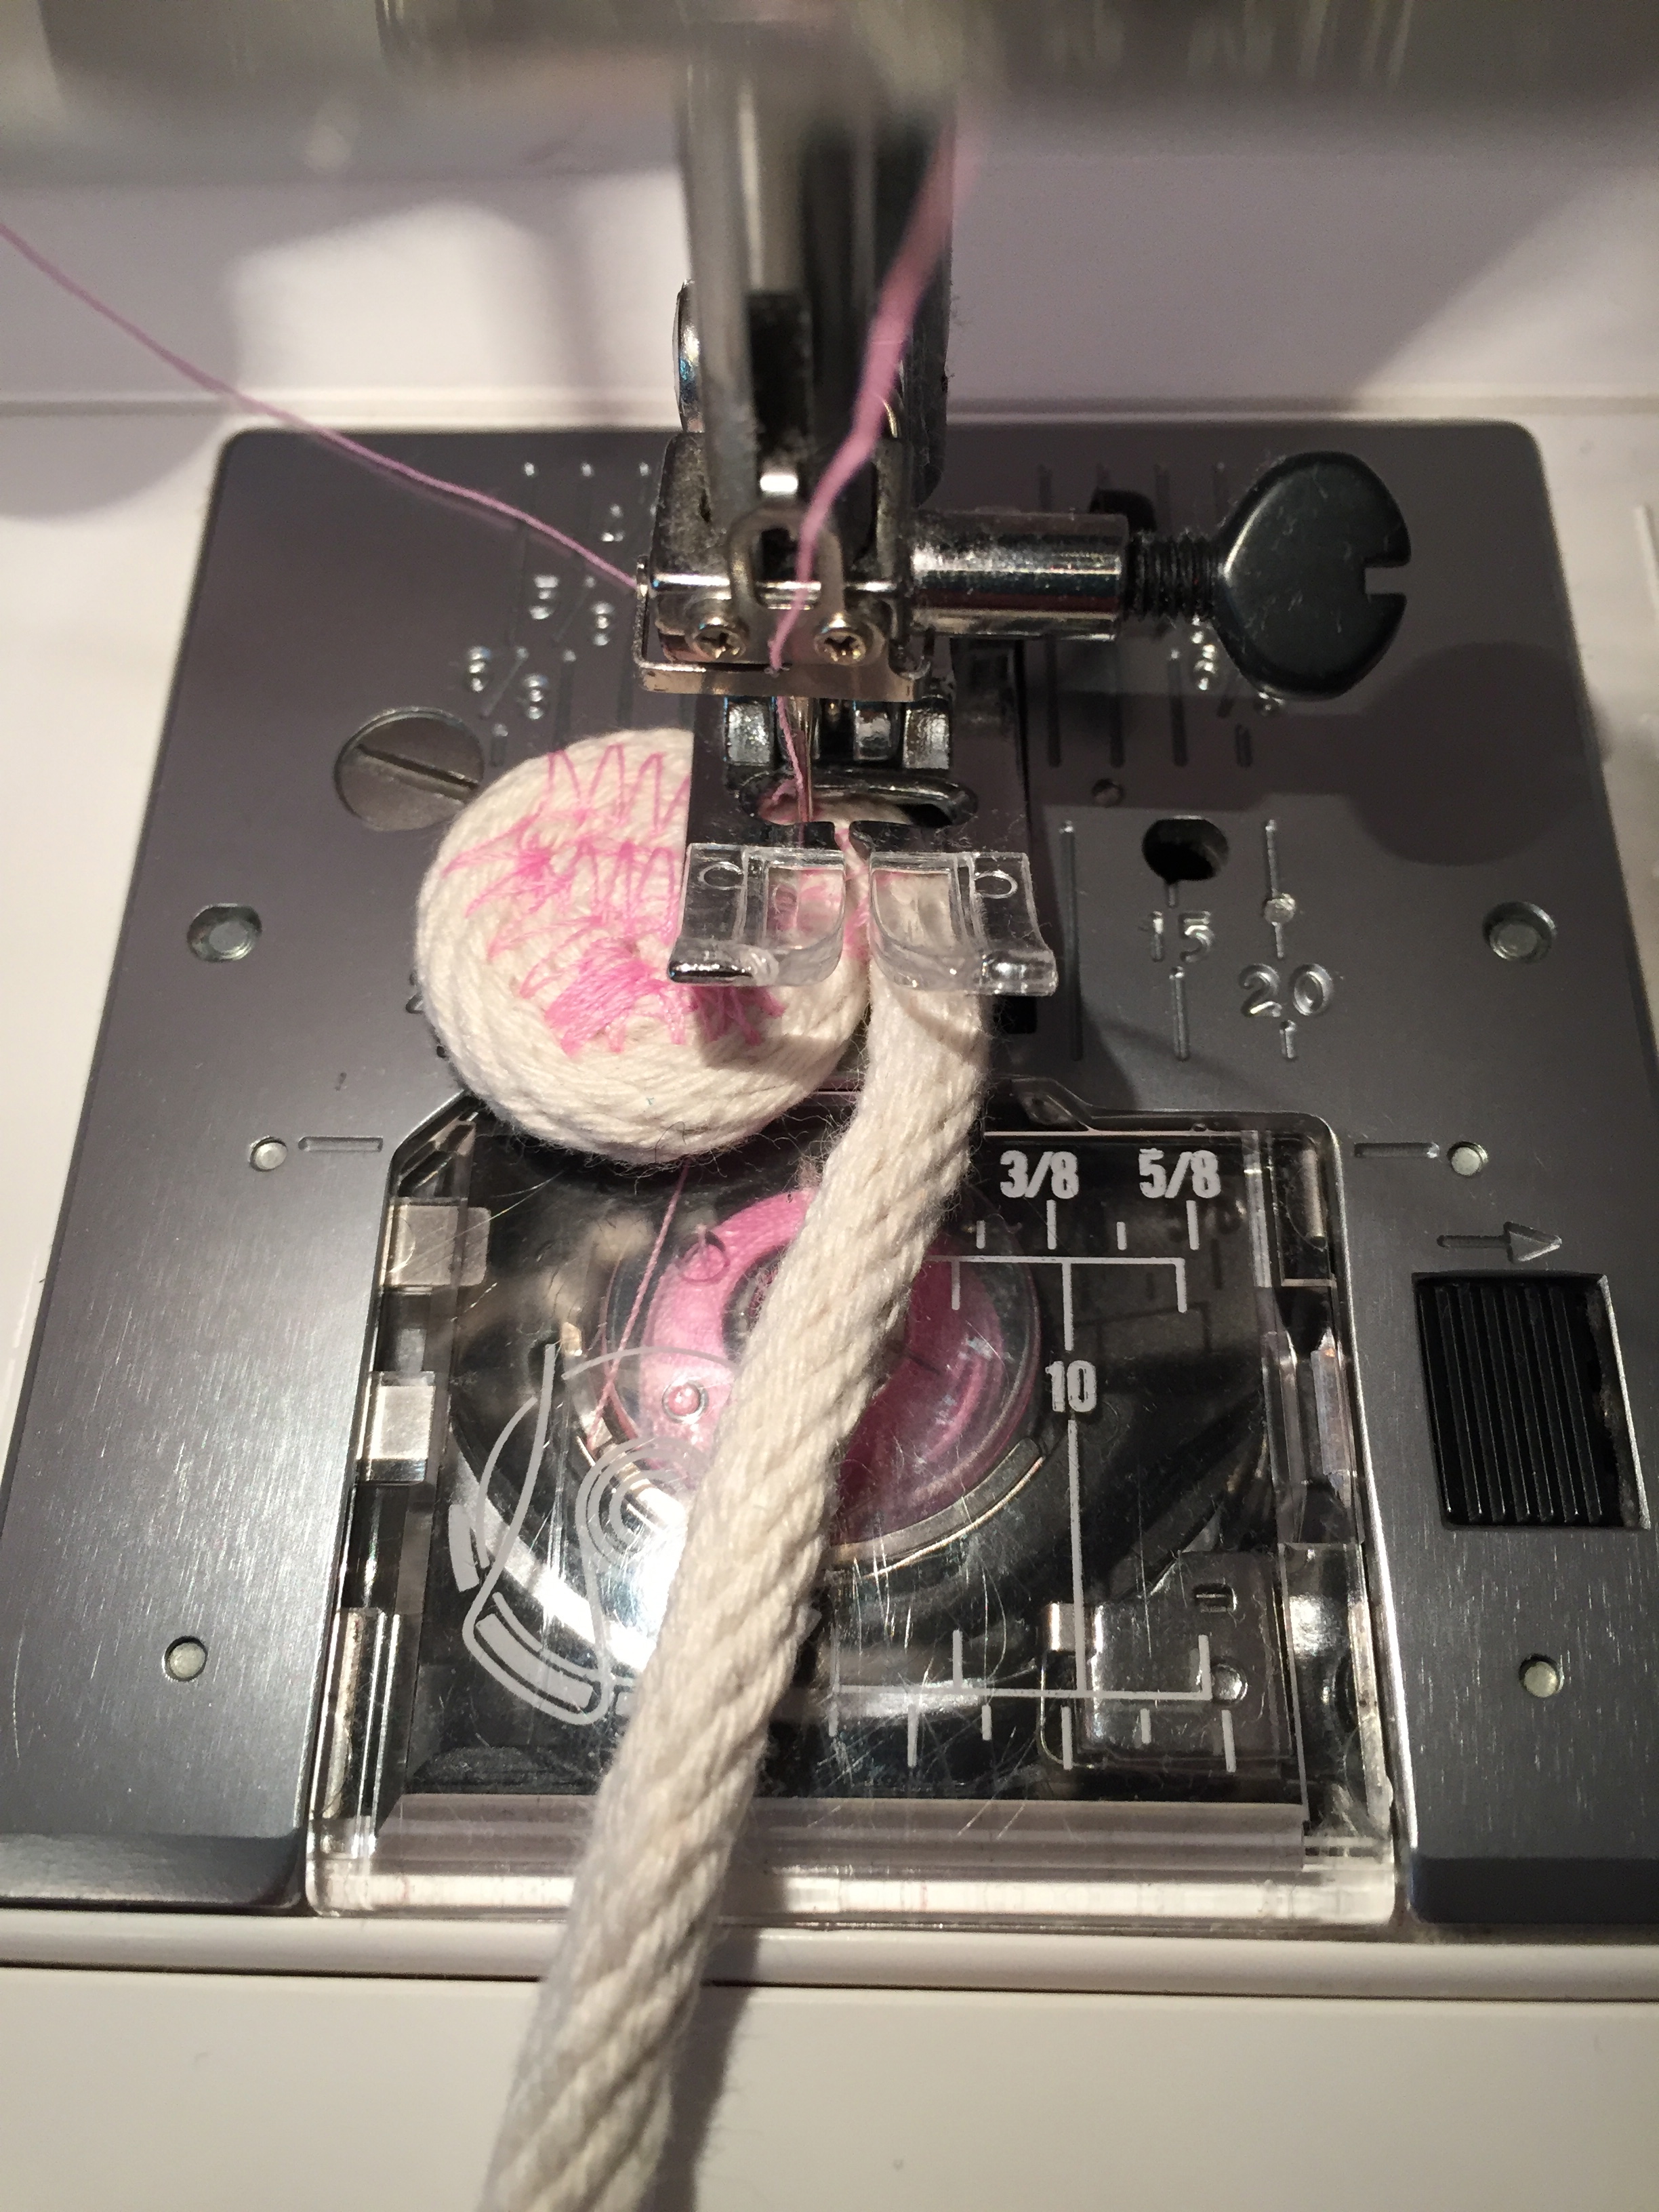
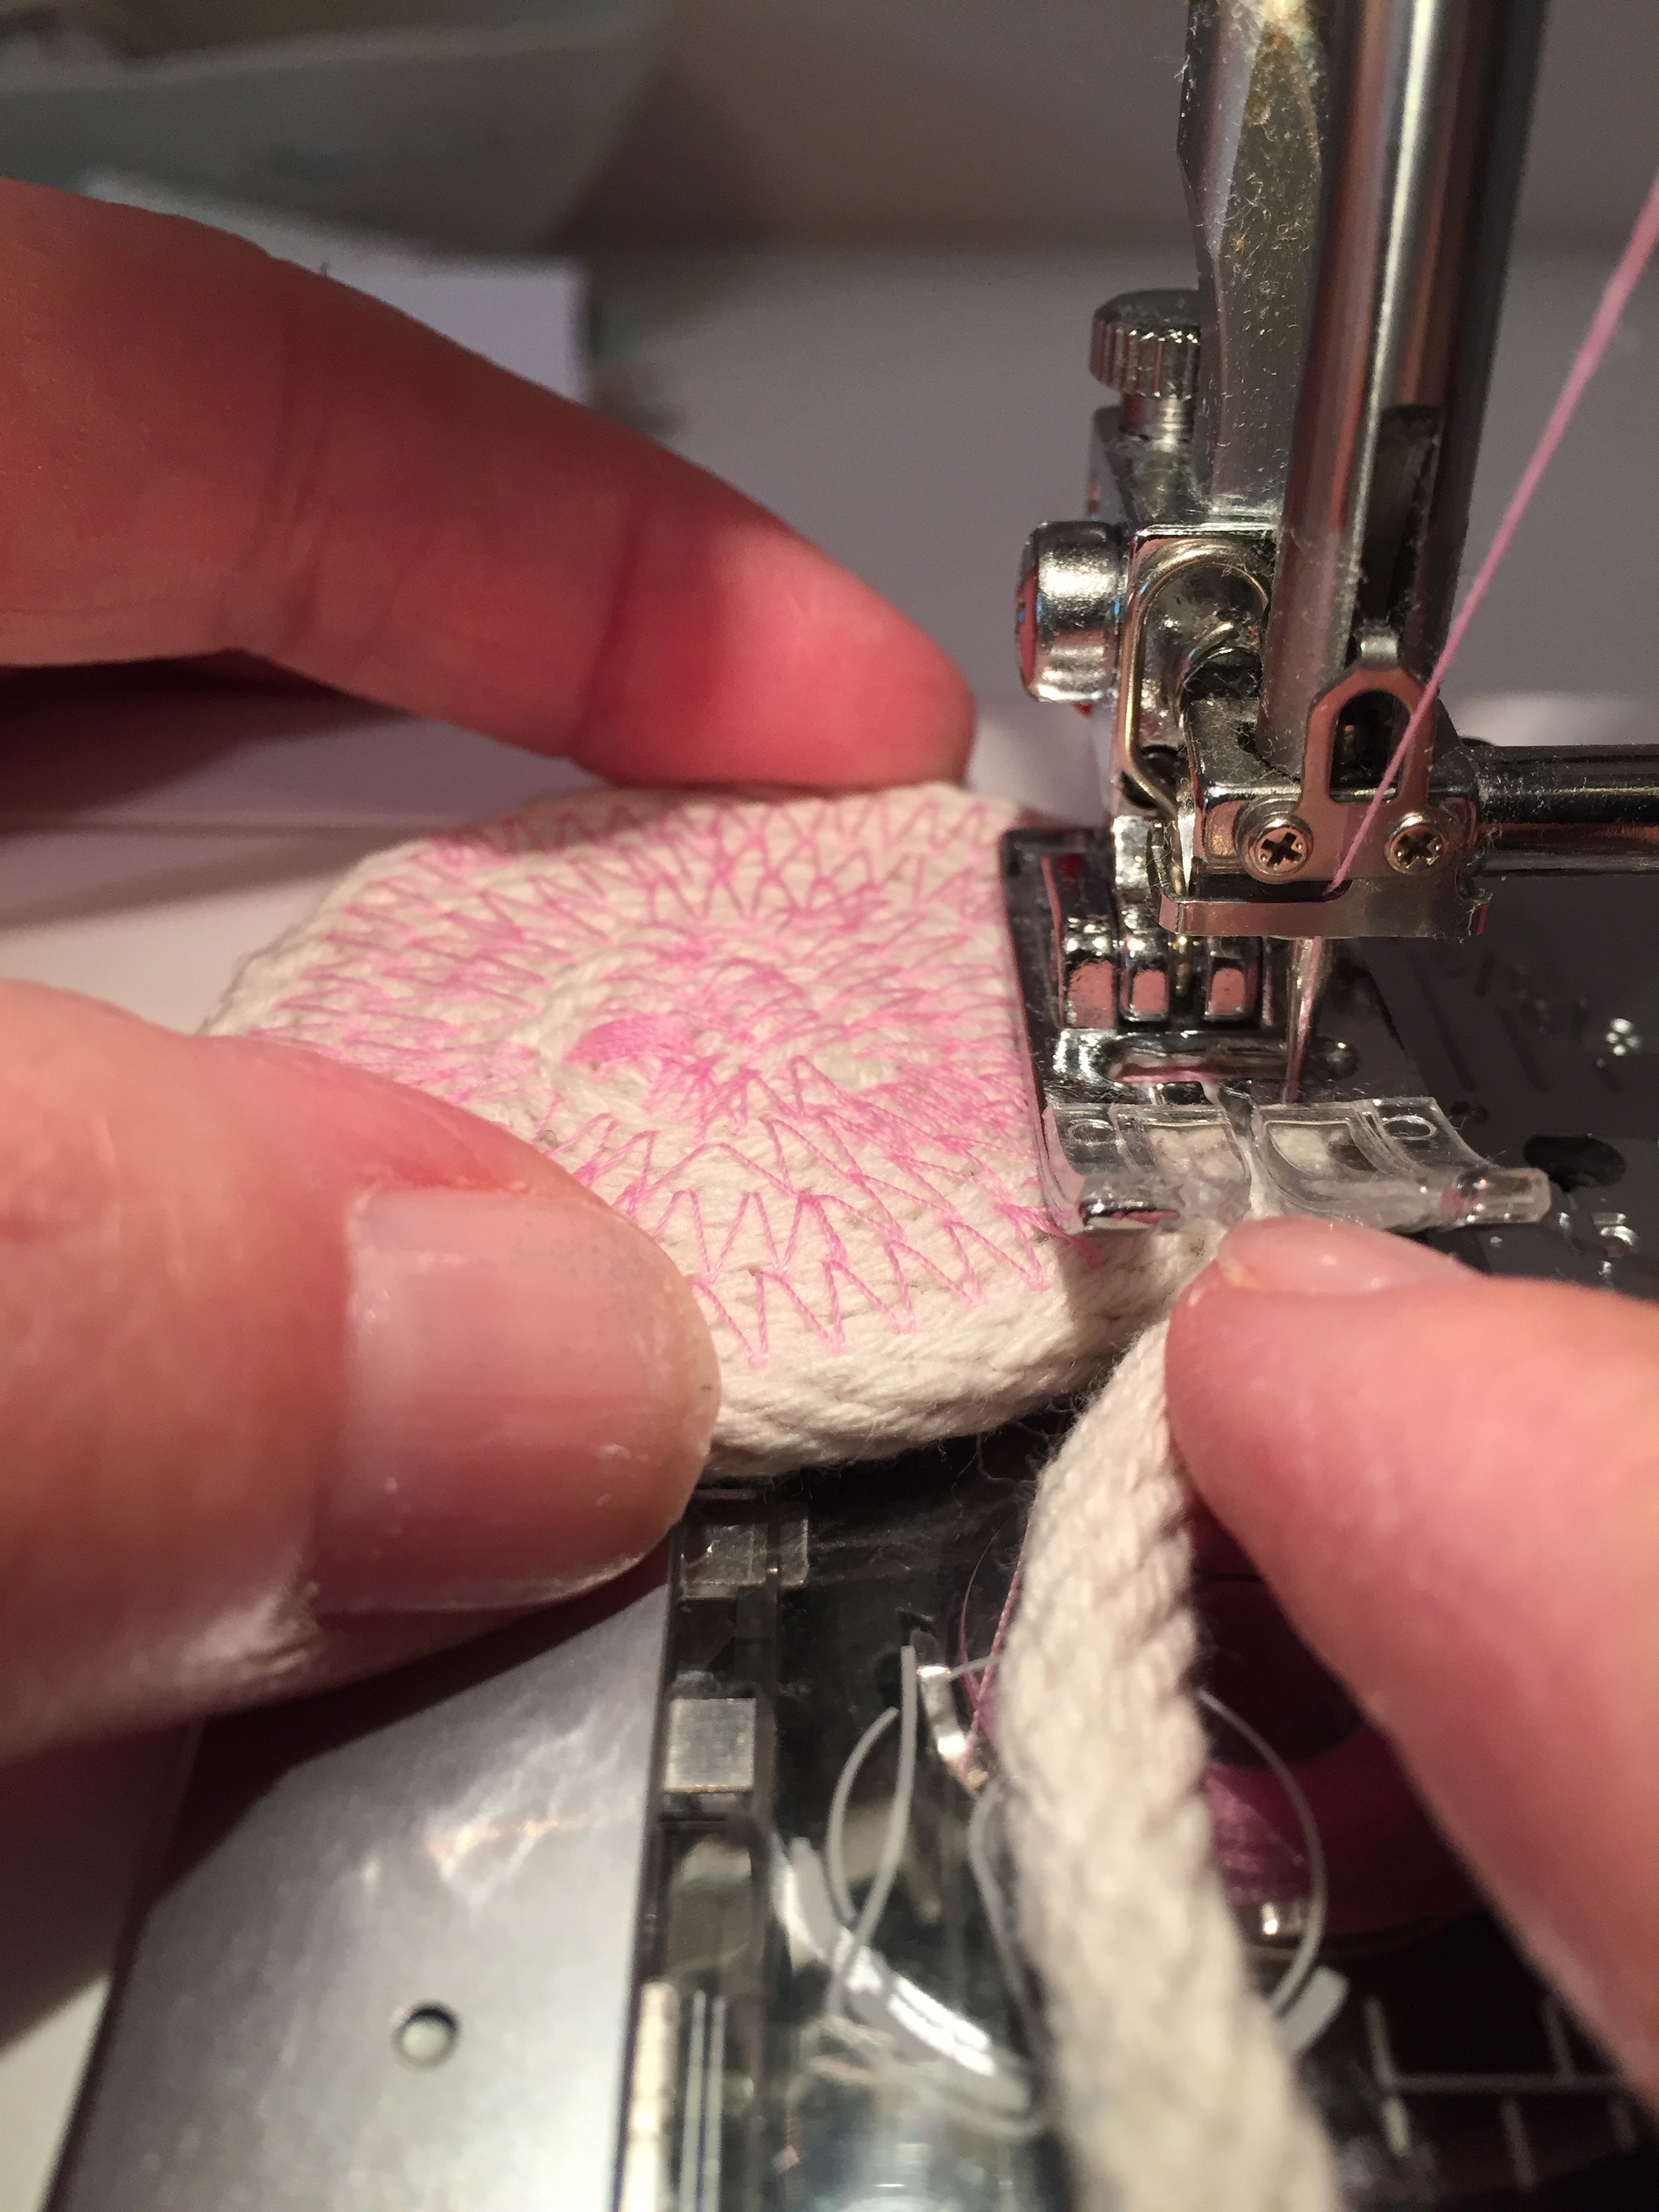
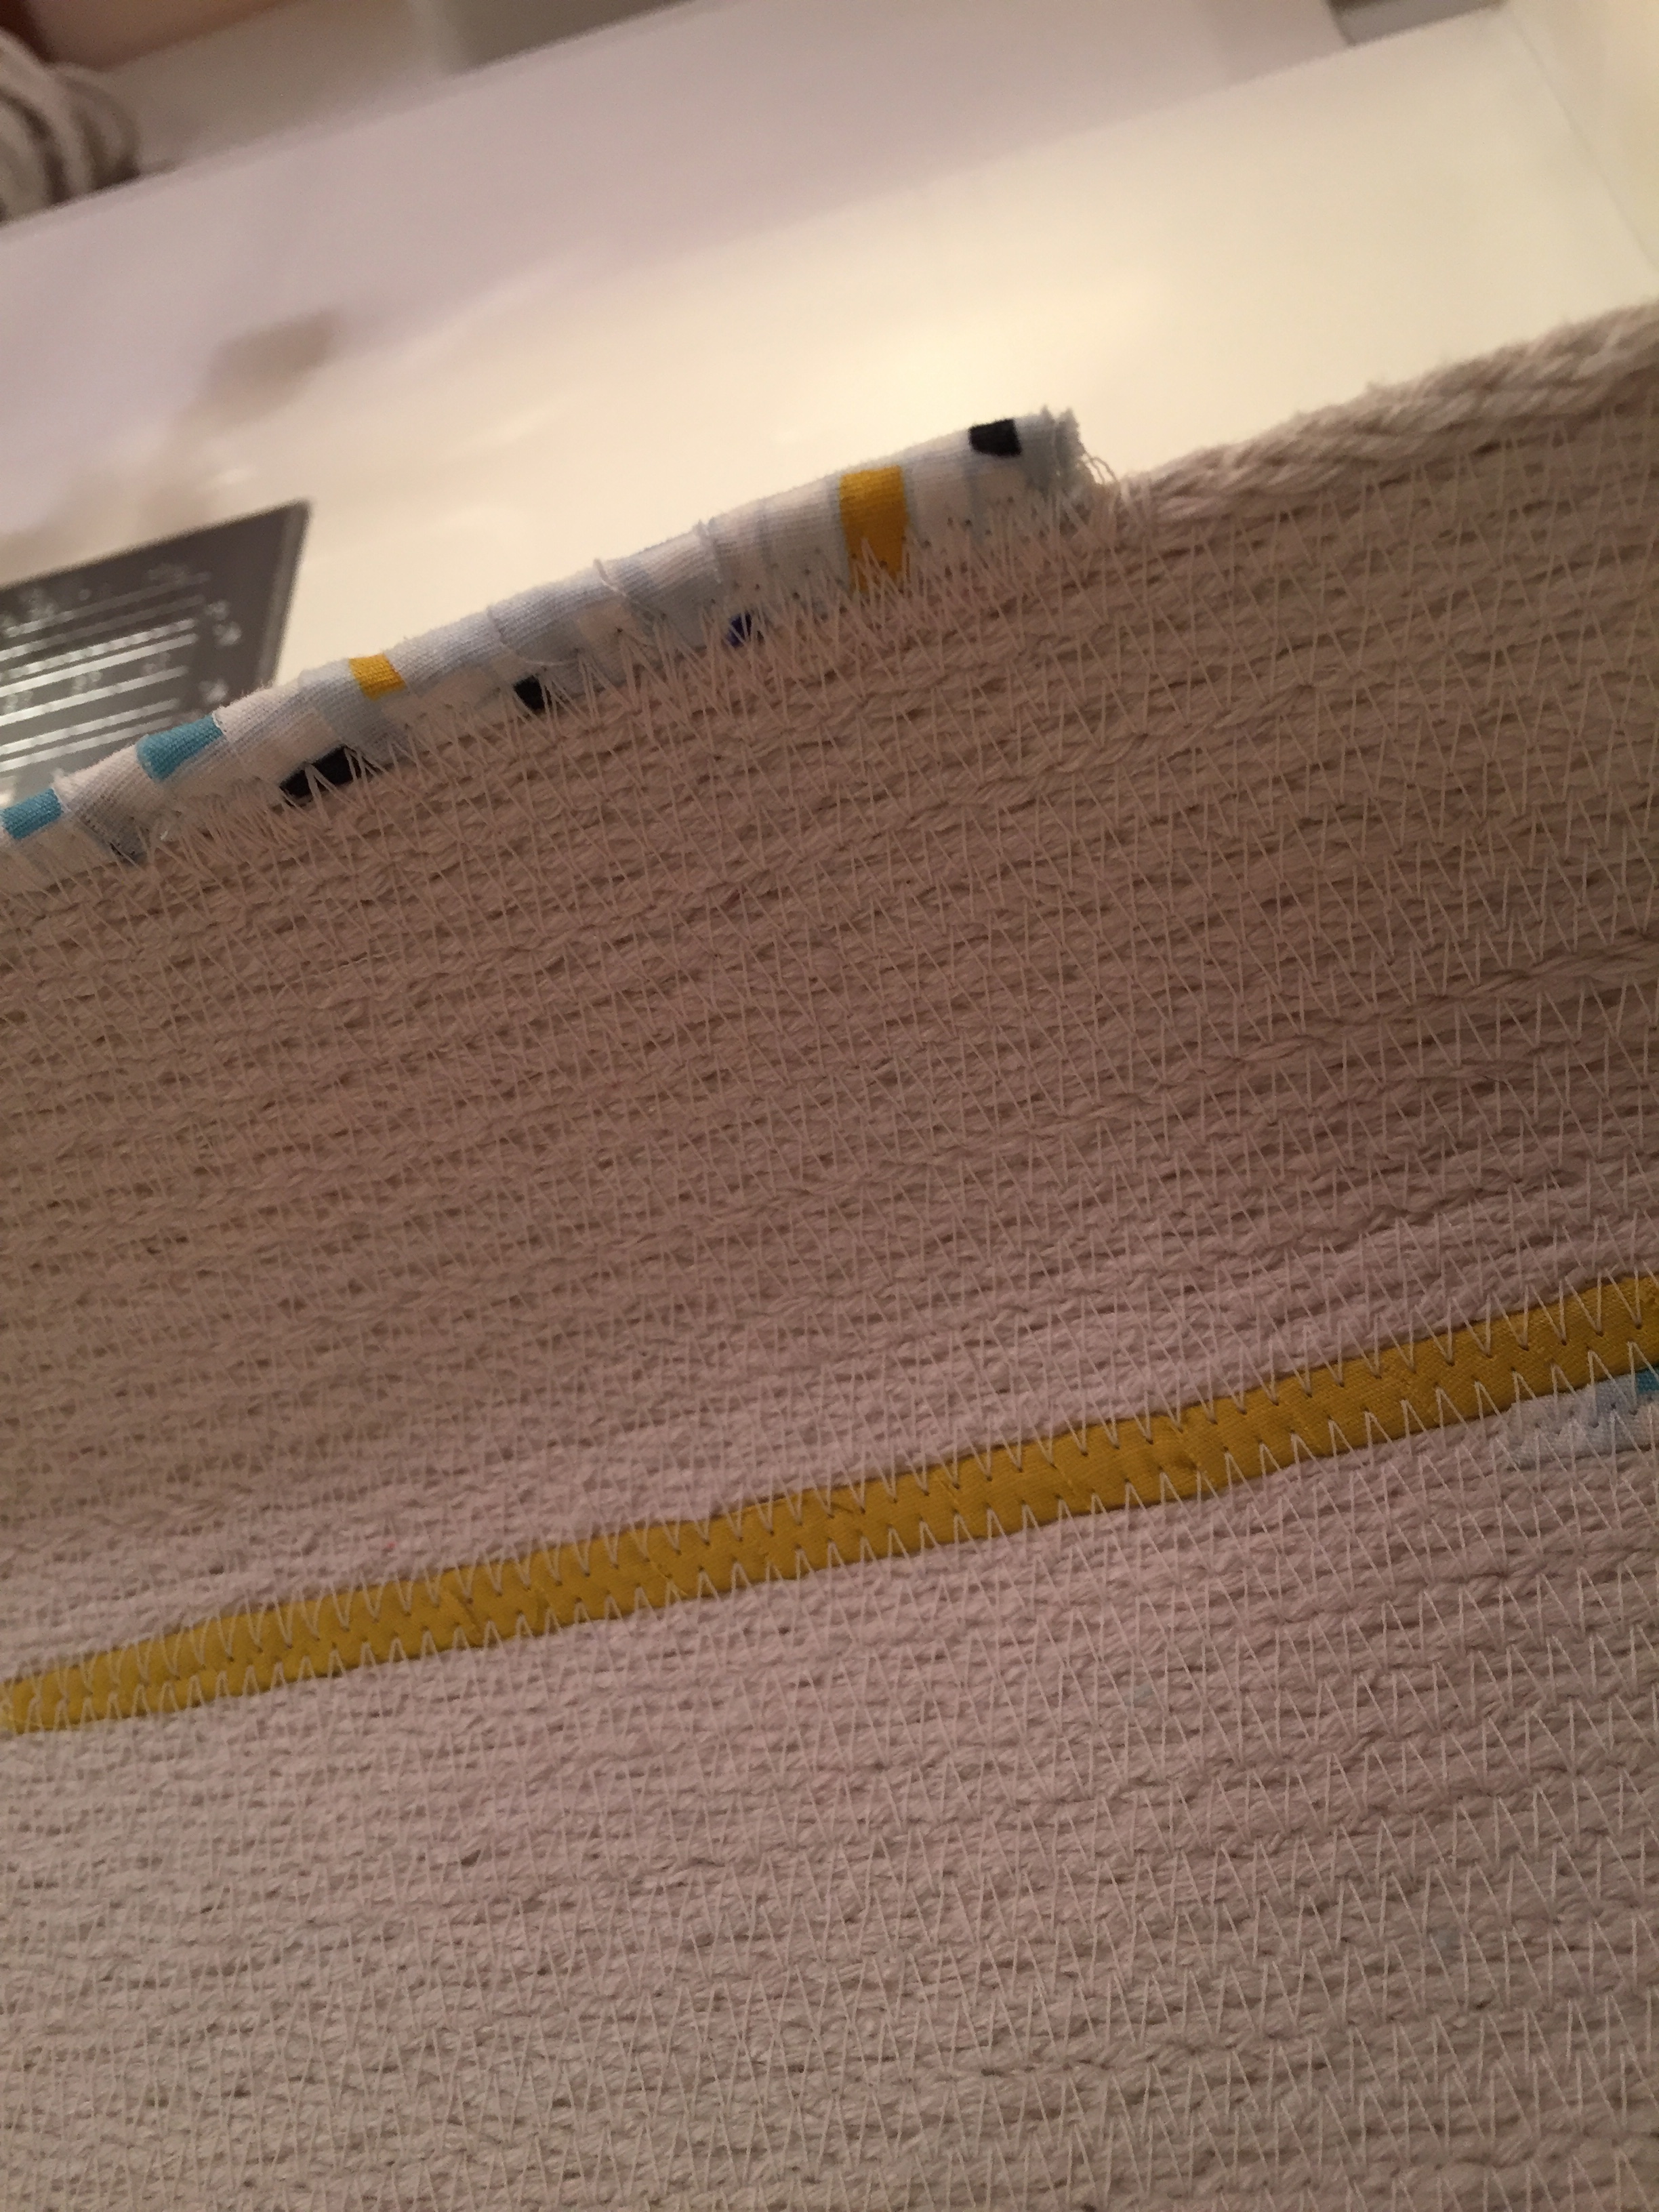
It looks messy, that first pass but it blends in nicely when you have a few rows of stitches in. You can put a pin through the center to hold your coil together or just hold it in place with your fingers. Once your center is secure, just start stitching around the circle. Looking at the presser foot above, you can see that I try to keep one side of the rope on one side of the split in the middle of the foot, and one side of the rope on the other side of the split. If you focus on that split and keeping it in the center of the two sections of rope you are joining together, you will get a good solid joining zig zag. You can see a little better what I mean in the photo below.

You will continue sewing in a circle, keeping your circle flat on your sewing machine as shown below, until you have a base that is the size you want for your bowl.
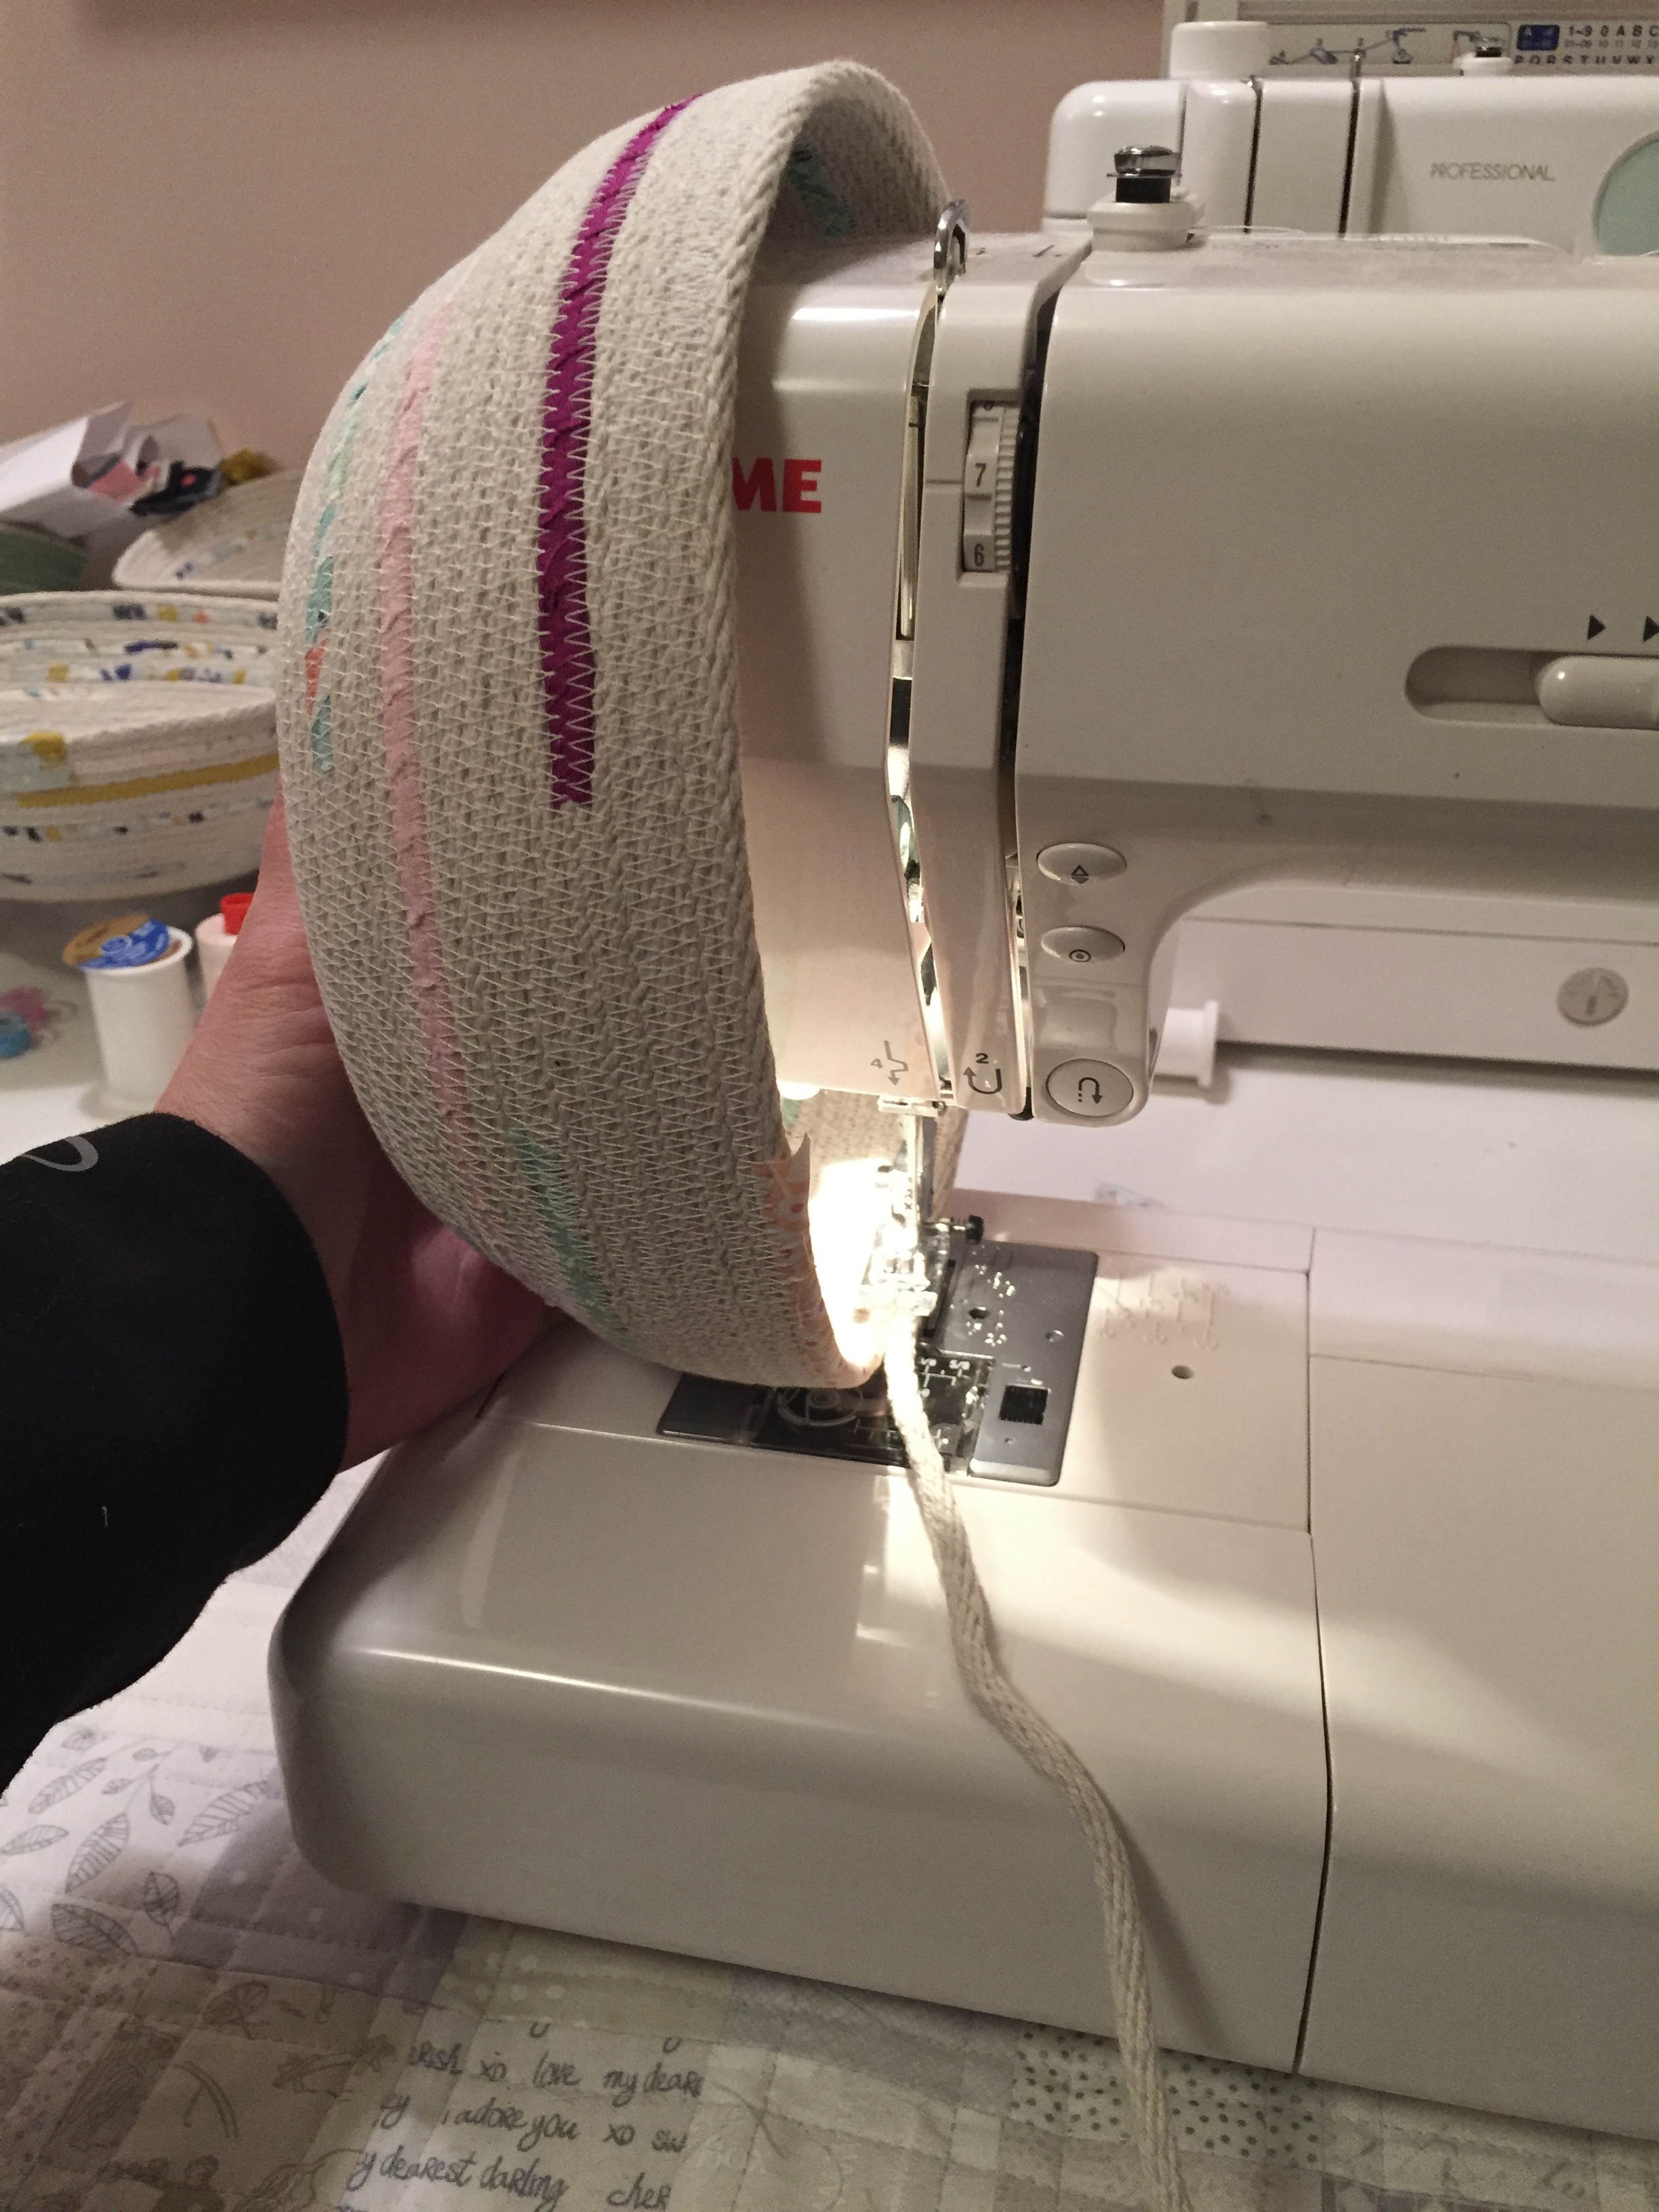
When your base is the size you want, it is time to start building the sides. All you do here is lift the base and keep your hand under it so that it is as perpendicular to the base of your machine as possible, continuing to sew while holding the base circle at that angle.

You can see that the machine is somewhat in the way but just hold it up as far as you can. This is the part I love, just sewing in a circle and watching the sides build up while listening to the very relaxing rhythmic sounds my sewing machine makes. Here you can see what it looks like when it has grown quite a bit. (Note- this is a different basket which started with a base much larger than the one pictured above).
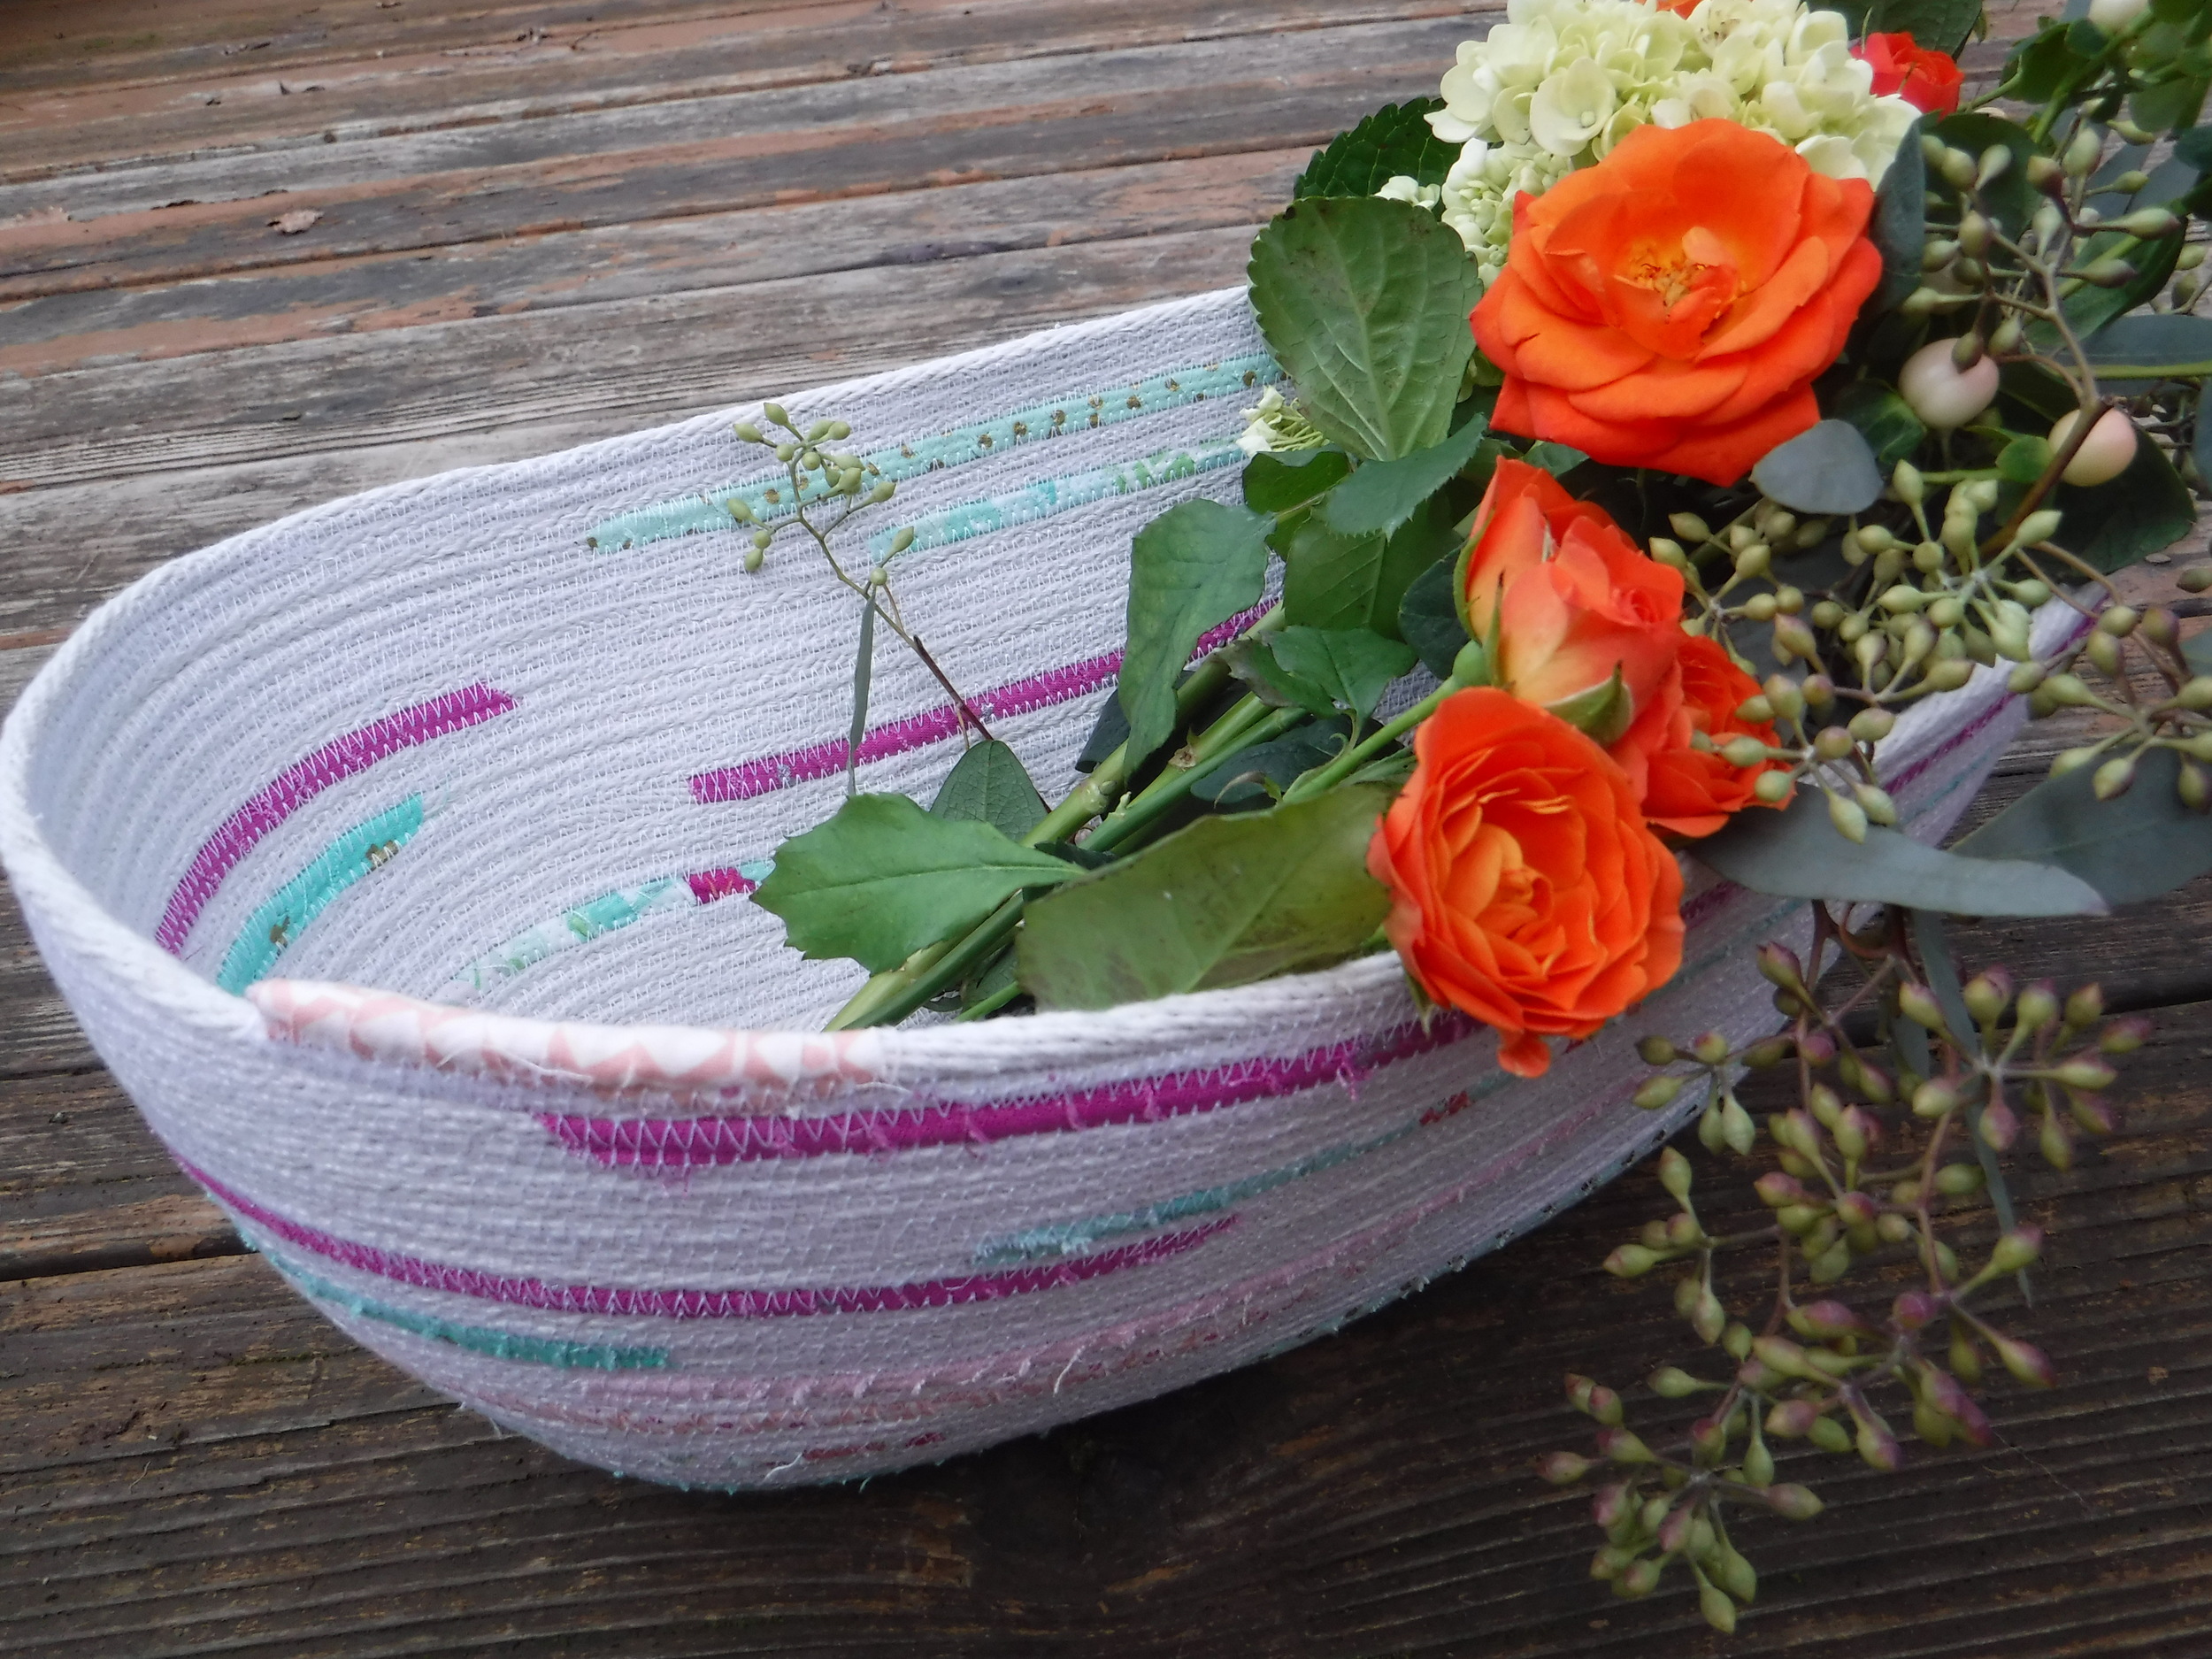
Sometimes you have to navigate around your machine a little but I find that the baskets are a bit flexible and if you have sewn a little wonky you can reshape when it is all finished and off your machine. The shape of the base will determine the shape of your basket. If you want a nice round basket, start with a circle. Here is the start of a longer oblong basket. I find this shape so useful, I made a good sized one that holds our mail.

Here it is filled with flowers.
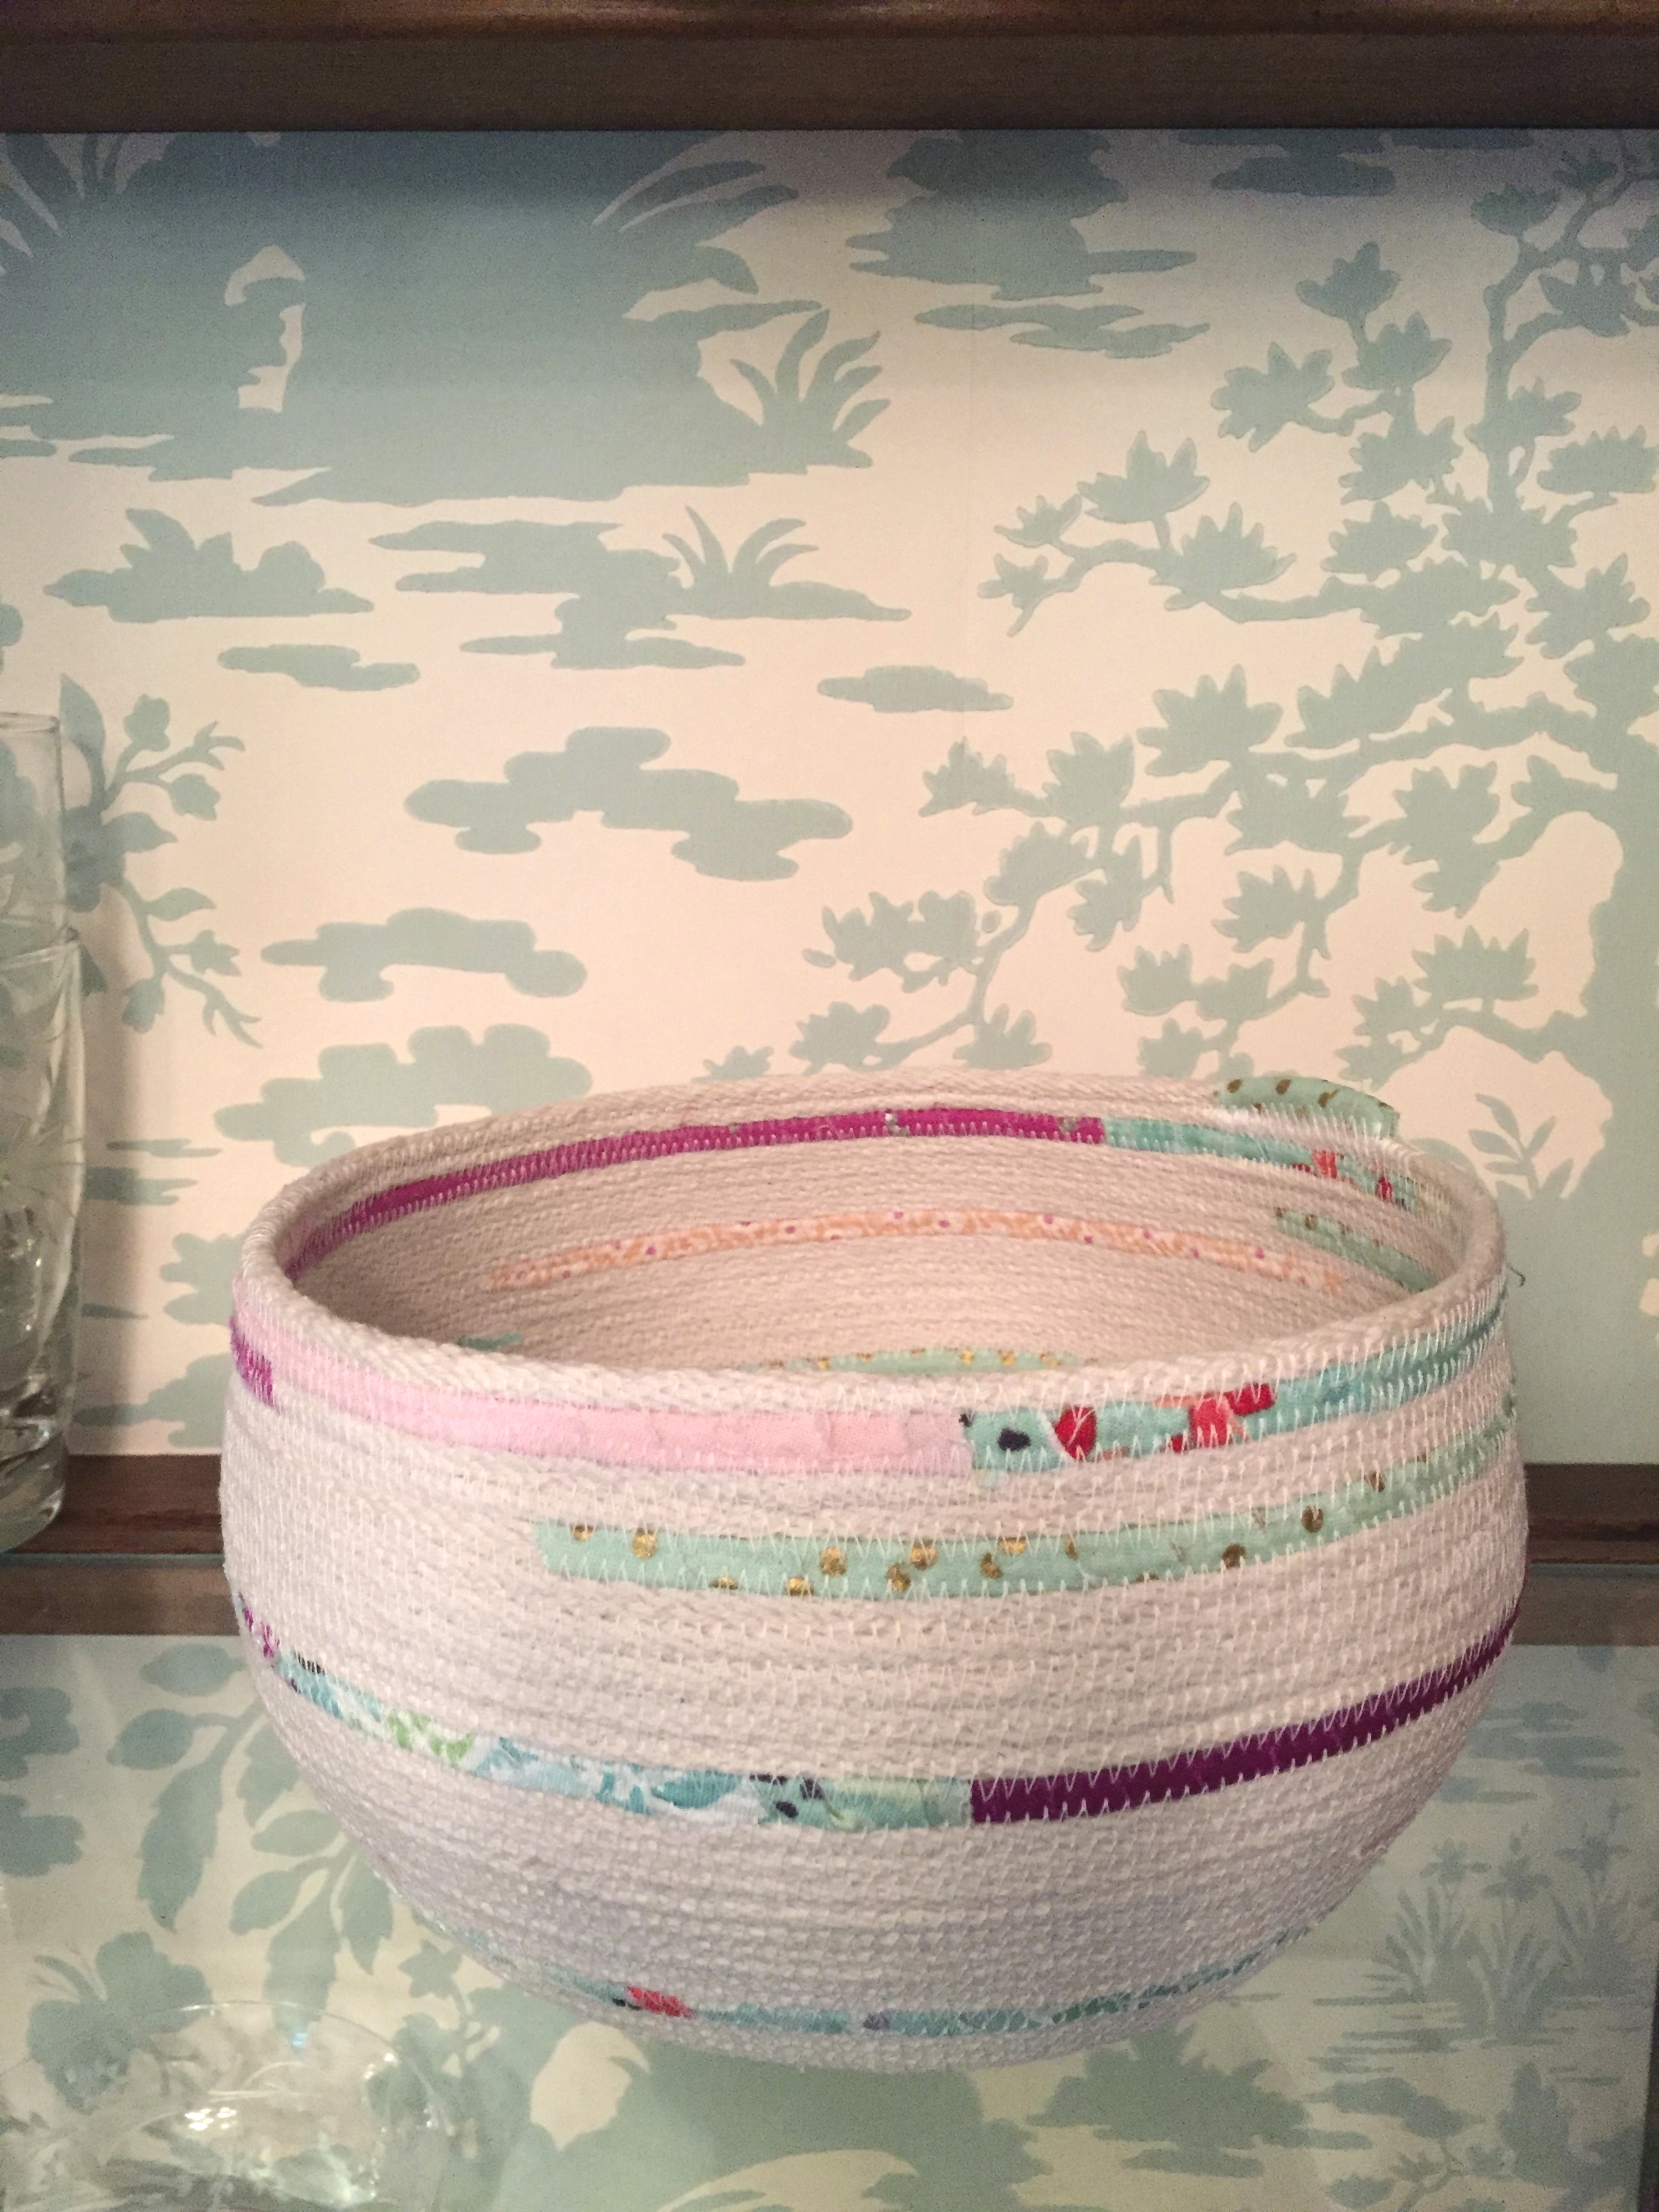
When your basket is the size you want it, there are lots of ways to finish it off and here is a good place to be creative and try something different. Generally I will finish with a loop or by covering it with fabric.
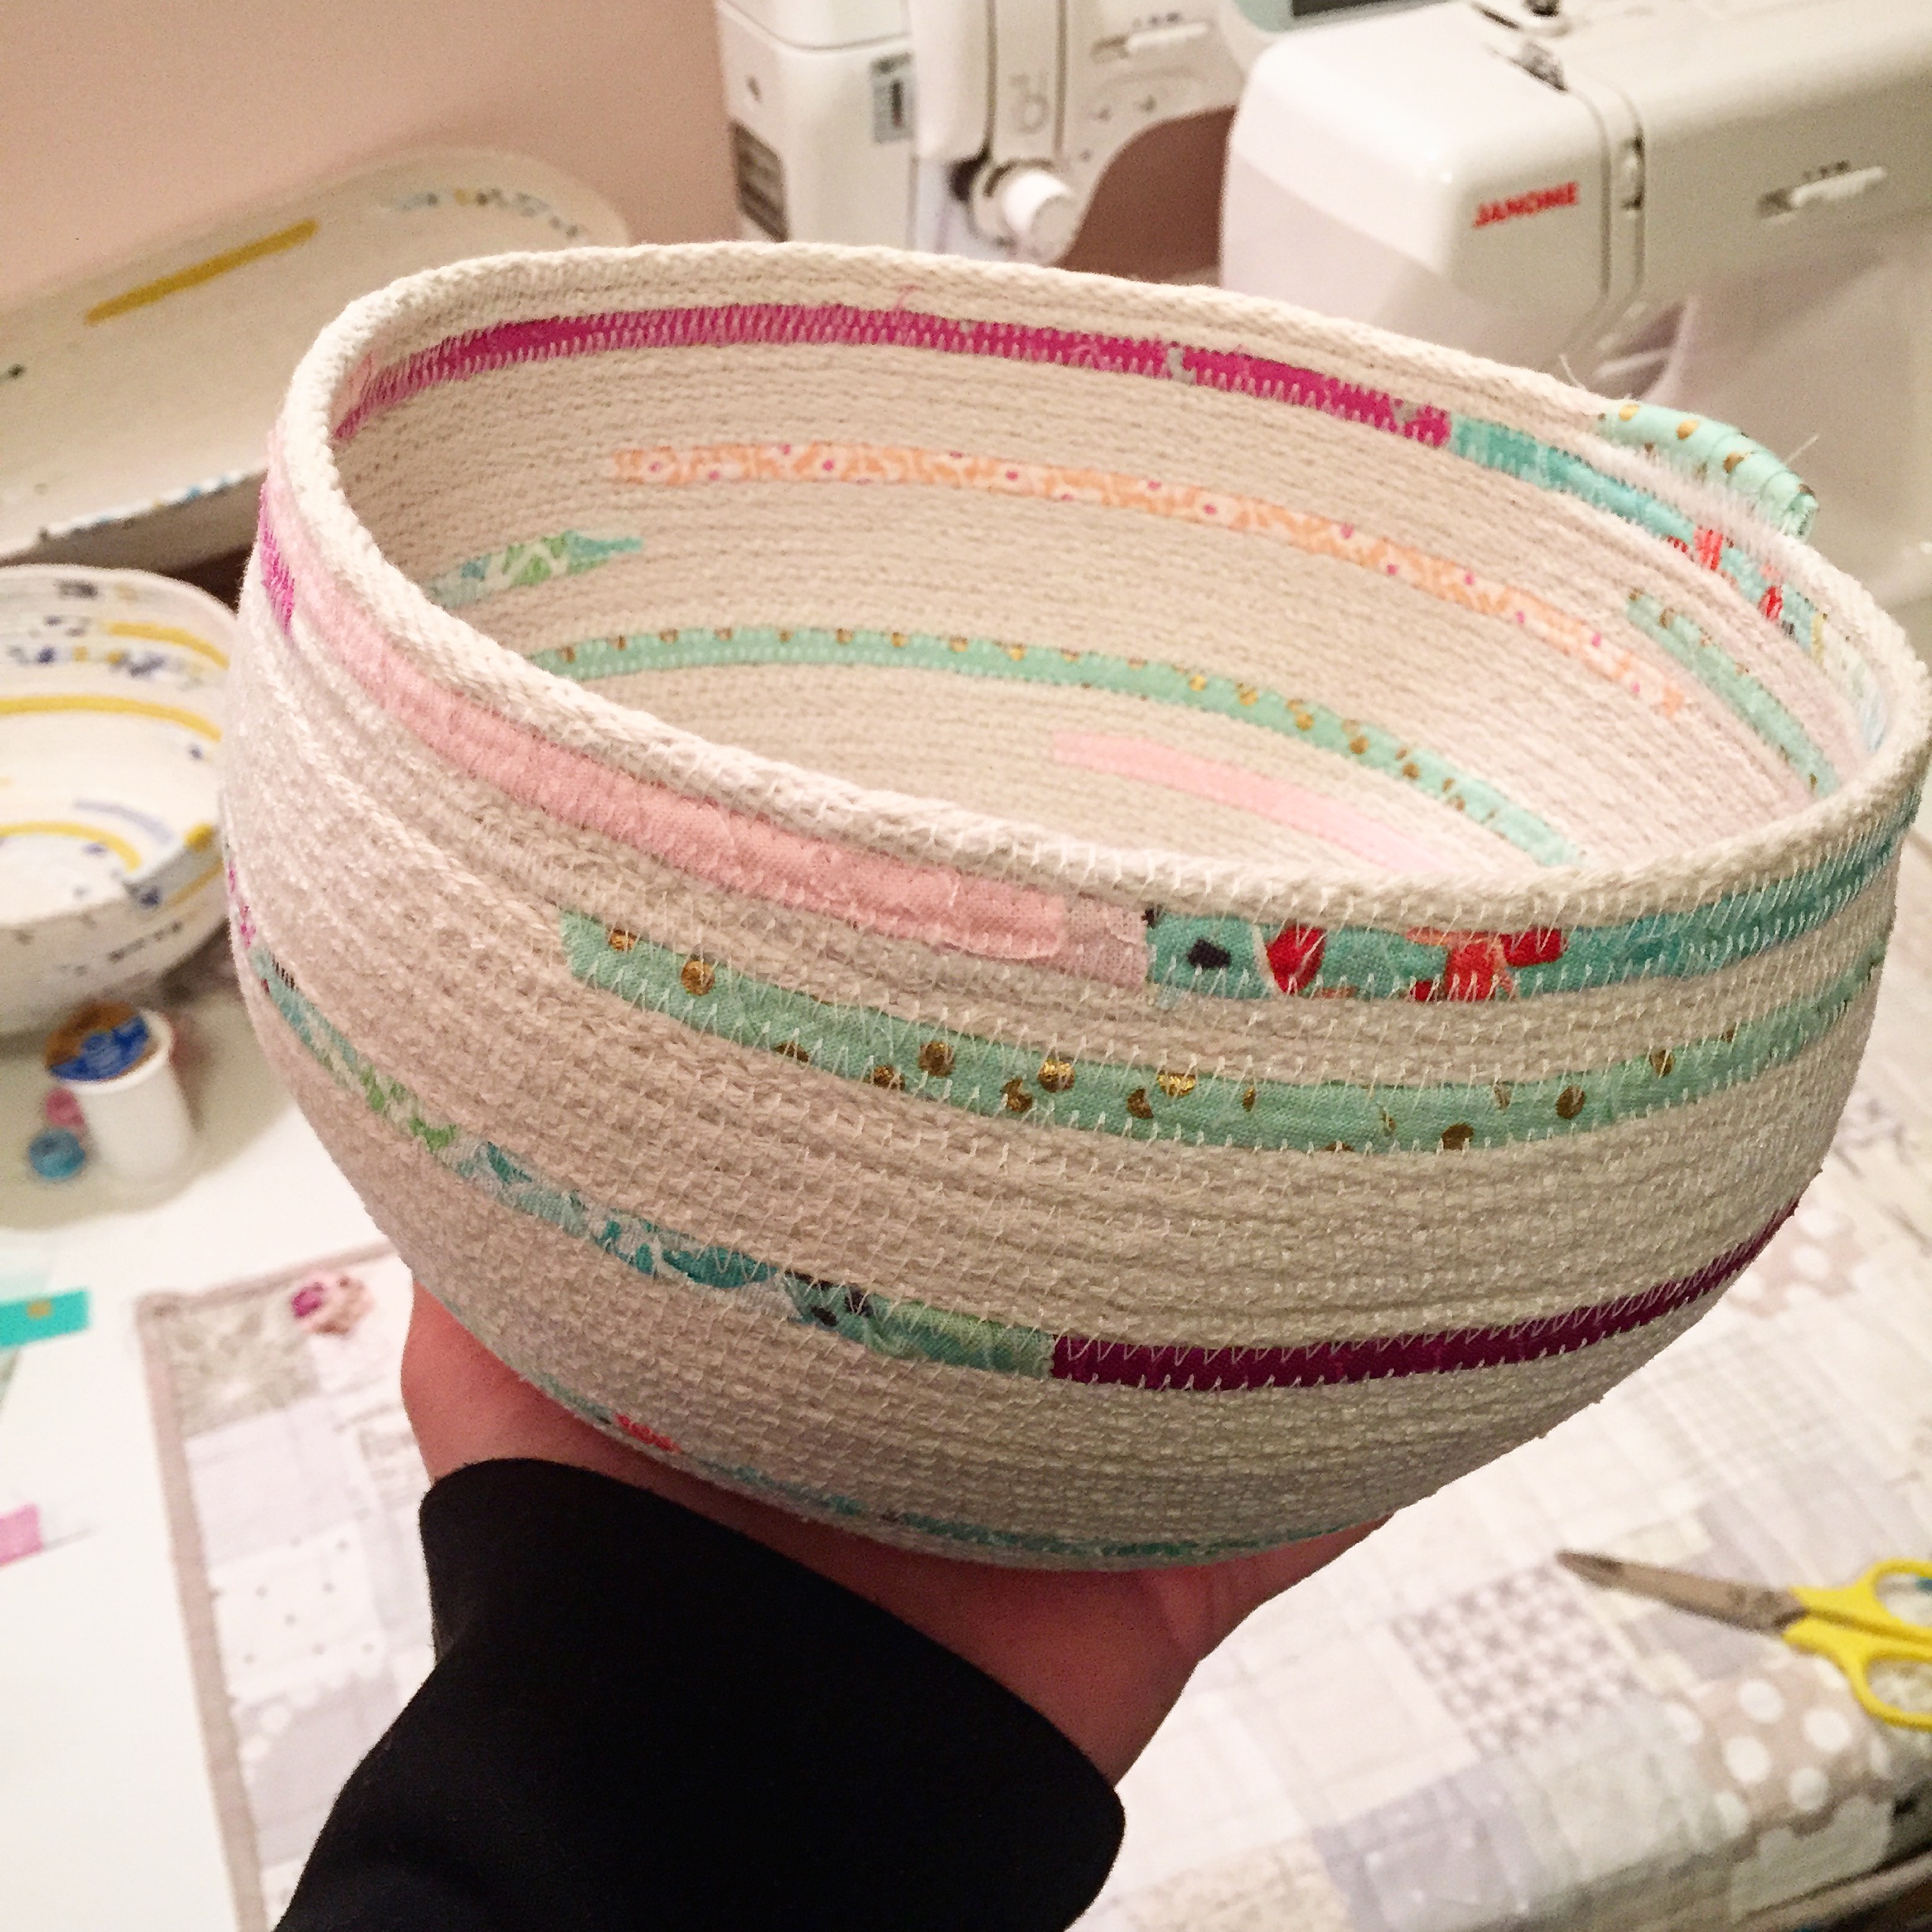
Finishing with a loop: When the bowl is as large as I want, I will cut a tail about 8 inches long. Just continue to sew and towards the end and loop the rope back on itself. Sew in place backtacking a few times to make sure you have caught the rope securely in your stitches. (You can see in this photo the nice cast of color the thread gives the basket.)

Fabric square finish:
Cut a square of fabric about 1.5" by 1.5". Press the edges down on all sides so you don't have any raw edges and then fold the fabric square over the end of the rope and stitch in place. You can also do this with a square of leather or felt (but don't press any edges down on those).

Another nice fabric finish is to cut a strip of fabric 3/4 inch by 6 inches and then wrap it tightly around the end, concealing the raw edge of the rope and then stitch in place. I like the nice clean look of this finish.
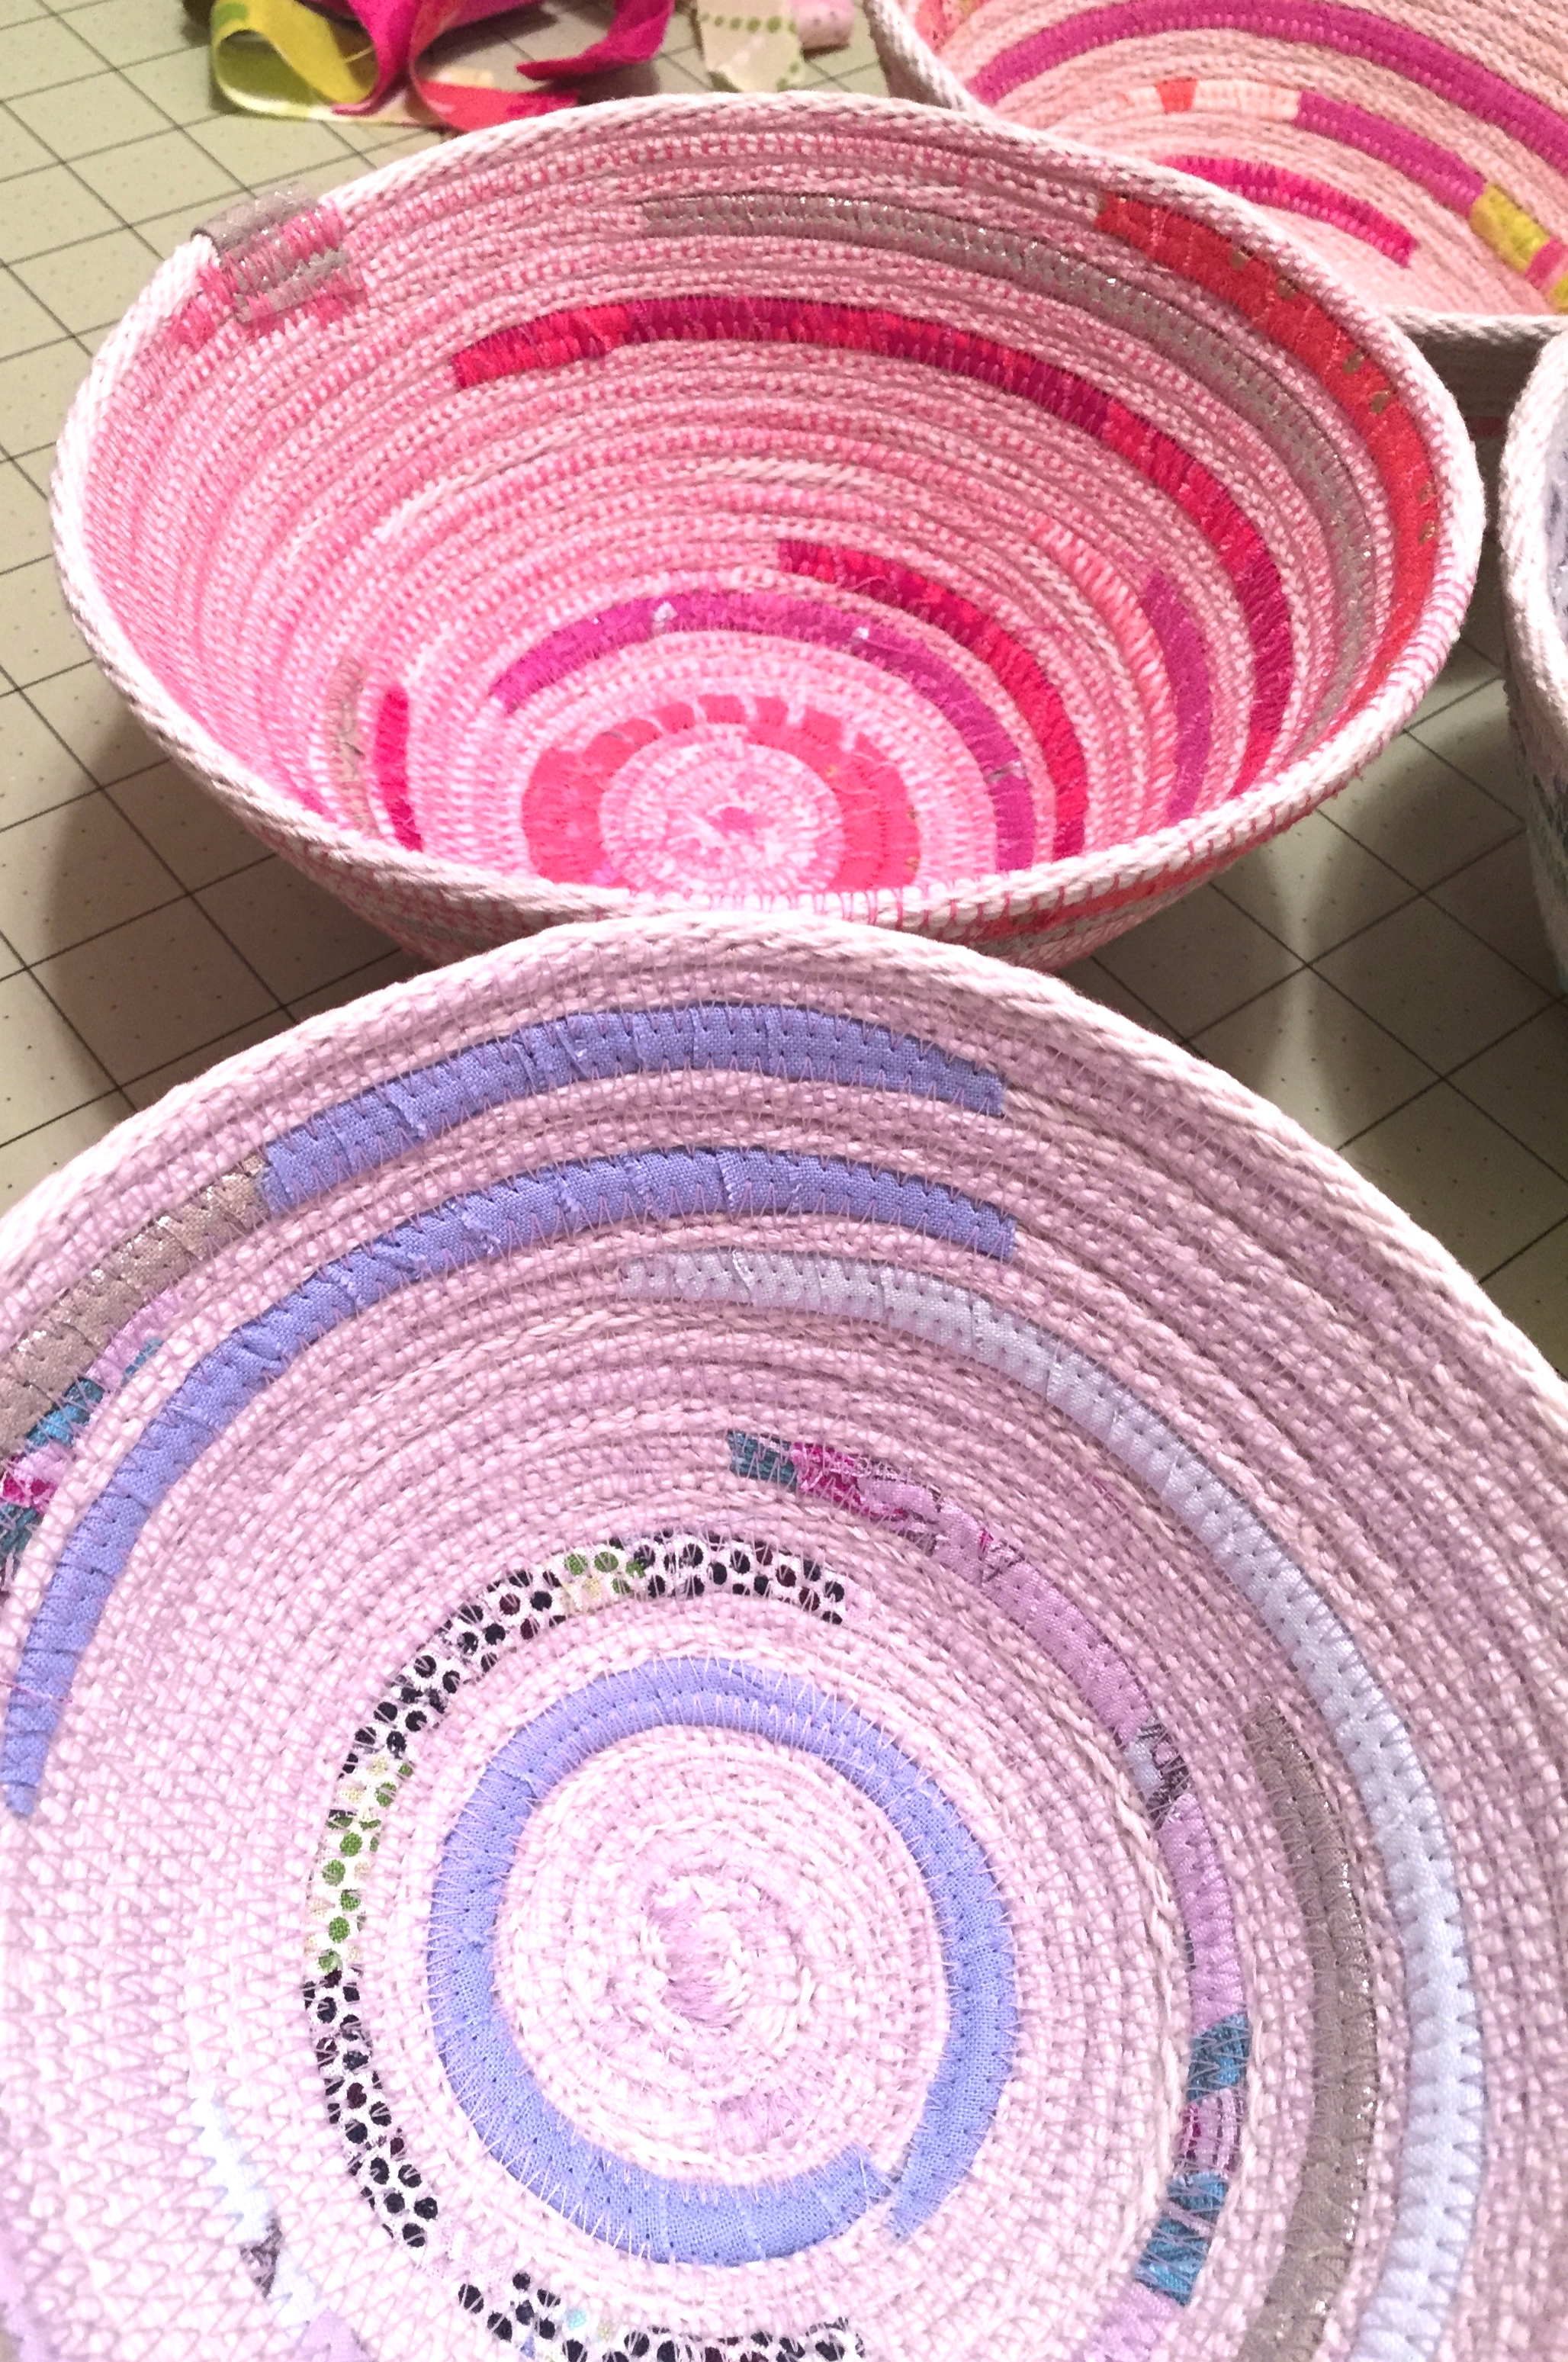
And that is basically it! There are lots of ways to improvise and give your baskets a little personality. My favorite thing to do is to wrap the rope in fabric strips which is something I learned about from Tia over at Tia Curtis Quilts. She makes the most beautiful baskets! Her tutorial is great and I find her so inspiring.
Another thing I think looks really sweet is using a tiny hexagon in the center to cover up the beginning of your basket. I make 1/2 inch hexagons and stitch them in place. You can either stitch across, going back and forth to make a star shape of stitching or stitch around the perimeter of the hexagon, either way it is adorable.


I hope this inspires you to give this a try! If you have specific questions just leave them in the comments and I will answer them there. I think you will enjoy making these as much as I do!

Happy Making!